Entry Manager

Overview

All the work put into creating a form would be useless without the ability to review and interact with the data that users enter. An Entry is a term ITAM refers to data a user has entered on a form. The Entry Manager is the tool ITAM provides to allow you to see the data entered and import, export, or delete entries, review entries, update statuses, edit entries, and interact with users.

This section will cover how to work with the Entry Manager to select an entry to review and the various options available when reviewing a particular entry.

Accessing the Entry Manager

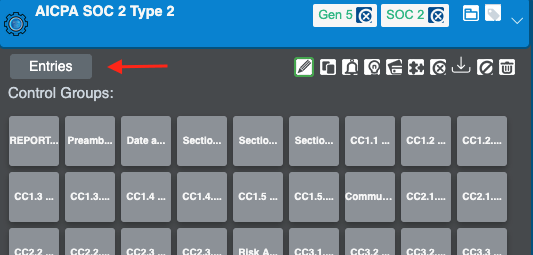
To access the Entry Manager, select a Form from the Forms List in the Form Manager and then select the View button on the advanced options above the form entry.

View Button

The main page of the Entry Manager consists of multiple sections. There is a main table that displays all the records of your entries. Depending on the data in each entry, the table will display the Entity, the Template Document (if any are associated), an option to enter audit mode, and the date the record was created.

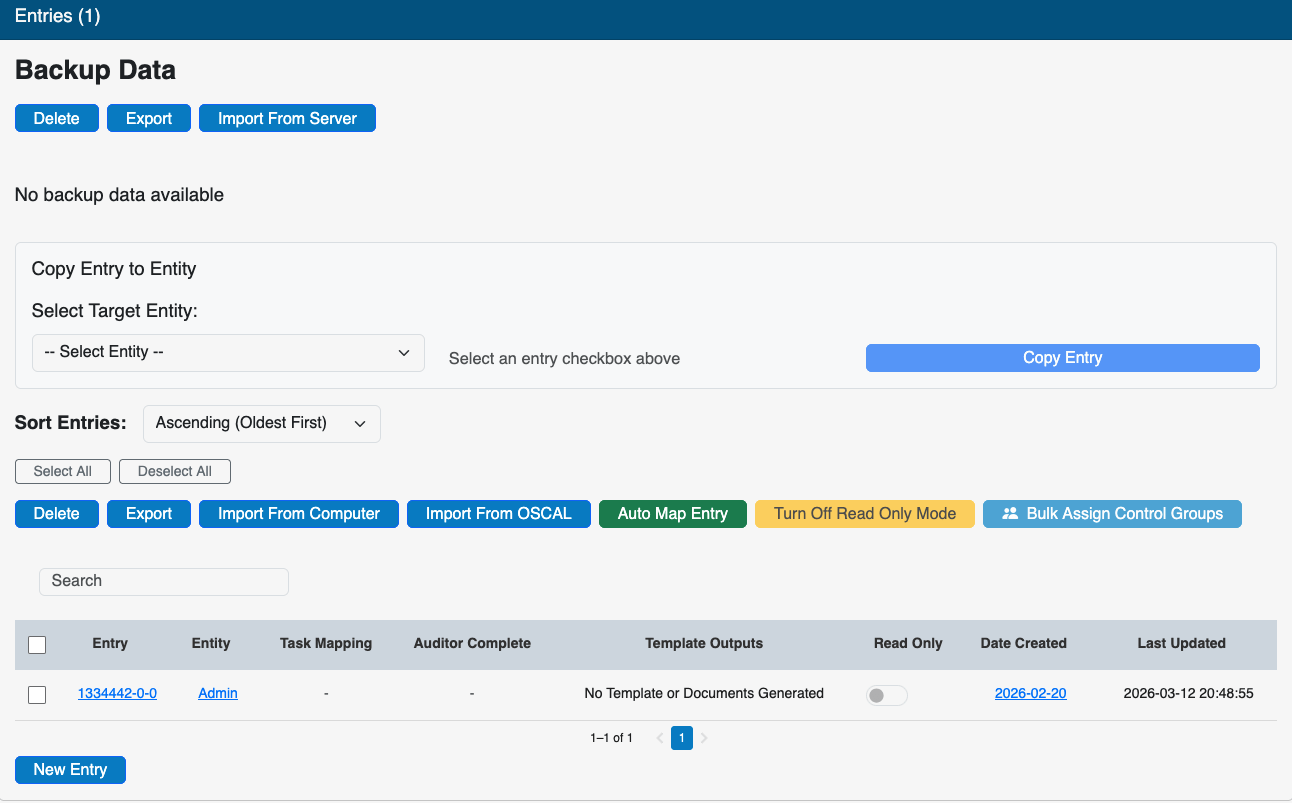
On the top left of the table, options to Delete, Export, or Import From Computer entries are provided. On the top right of the table, options allow you to filter users and display selected fields. A drop-down menu to sort your entries by any field is available at the bottom right of the table.

On the lower half of the page is a list of administrators, examiners, and portal users who have access to the form with which the entries are associated. At the bottom of the page is metadata about the form, including the Created Date, the Administrator who created the form (Created By), total Completed and Incomplete entries, and the time since the last Entry.

Managing Entries

The Entry Manager has some features for filtering and organizing the entries, allowing for precise control of the data displayed and quick access to and viewing of the desired data.

Filtering Entries

The filter entries feature is one of the most powerful functionalities of the IT Audit Machine and is designed to help you find a specific entry on a form. You can filter entries based on one or more conditions. Click on the Filter Entries link at the top of the entries, and the Filter Builder will be displayed. Select the field as the filter from the drop-down, select a logic option, and define the comparison value.

Note: The Filter Users tool filters the entries on a form, not the “users” with access to the form denoted below the entries.

Click the plus icon on the right to add more conditions. After defining all the necessary filters, click the Apply Filter button. All entries matching the specified filters will be displayed. Note that by default, the IT Audit Machine will “remember” the last filter applied to a specific form even when the user logs out of ITAM.

Click the Edit link in the Display Filtered Entry pane to edit an existing filter. Click the Clear Filter link in the Display Filtered Entry pane to remove a filter set.

Note: Neither applying nor clearing a filter removes data from the database. Filters only affect the entries selected for display and export.

Displaying Selected Fields

The field column space on the Entry Manager display is limited. Depending on the form and your needs, it may be necessary to modify the displayed fields to restrict the view to only the most critical fields.

Click the Select Fields button at the top right corner of the entries list to display a list of the fields in the form. Select the fields to be displayed, and then click Apply. The display will be updated to show the selected fields.

Exporting Entries

IT Audit Machine allows the export of all form entries to an Excel, CSV, or tab-separated text file. Filter and select the entries to be exported, and then click the Export button at the top left of the Entry Manager list. If no entries are explicitly specified, ITAM will export all of the entries, applying any defined filters.

Importing Entries

Previously exported entries can be imported as a ZIP file of data. Clicking on the Import From Computer button in the Entry Manager will open a dialog on your computer to select the file for import. Select the file you wish to import and click Open to import.

Deleting Entries

Entries can be removed from a form using the Delete button in the Entry Manager. Select one or more entries from the list and click the Delete button.

Audit Mode

An entry can be set in Audit mode via a toggle button visible on the list of entries on the dashboard. Audit mode places that specific entry on the form in a read-only state where no regular users can edit the entry. This is frequently used for a final QA Review before completing the Audit process but can be used before temporarily freezing the entry's state so it can be reviewed.

Entry Detail

Once a form has been submitted, it is essential to review it to ensure the data entered is correct and sufficient. This will require viewing the data and possibly interacting with the user who entered it to update it or fix any deficiencies. Most of that work is accomplished via the Entry Detail screens.

The Entry Detail screens have three main areas for you to interact with the entry. At the top of each page is a breadcrumb trail showing the ID of the current entry and providing navigation back to the related form and the Entry Manager for that form.

Additional navigation and management functions are also available in a side pane that allows you to move between views of the current entry’s data and different entries. The actions displayed as you work with the entry using the various capabilities will change based on the context of the functionality you are currently working within.

Side Navigation

View Entry

To view the detailed information on an entry, click the row in the entry list on the main page of the Entry Manager.

Note: While working within an entry, Back to Details or a View button will sometimes be available, taking you back to this page.

In addition to the standard breadcrumb navigation, a tool to move the data to another Portal Entity is at the top right.

Below those options is a graphical display of the Status, Risk, and Maturity Scores.

Note: The Status score chart displays the total number of data points in the entry in the middle of the circle and the number in each status in the ring around the graph.

Below are the scores and details about the data in the specific entry. Most of these can be edited using the Edit Field link provided.

There is also a View History link, which allows an admin to view the changes made to that field over time and even roll back to a previous value.

The bottom of the Data Detail screen contains metadata information for the entry, such as the creation date/time, user, and IP address. This information and a graphical representation of the status timeline show changes in the score and maturity values over time.

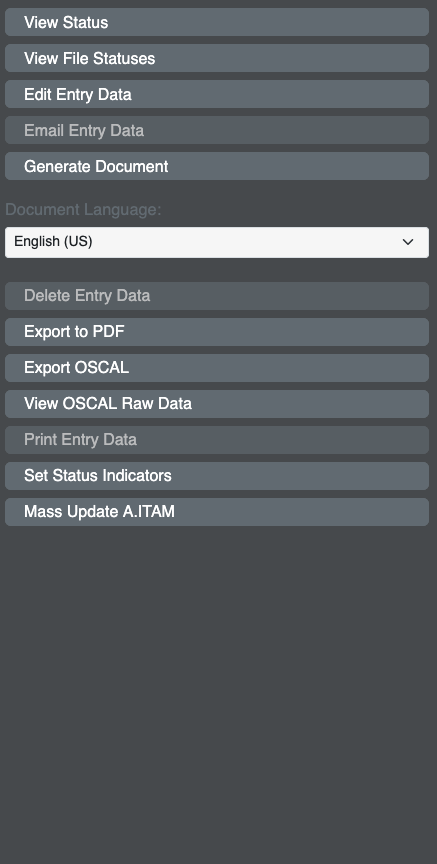
As an alternative to opening each entry from the Entry Manager, the user can iterate through the other entries using the forward and back buttons provided once an administrative user opens an entry.

Editing an Entry

When viewing an entry's details, you may edit it by clicking the Edit link at the top right corner of that page. Placing the entry in edit mode allows you to edit all pages of a multiple-page form.

Warning: The Date Updated field will be updated each time the entry is updated.

If a user locks an entry, the edit options will be redirected to the view page, and a notification will be displayed indicating who locked the form and the date. A button will be available to unlock the form if the user is certain that the locking user is no longer modifying it.

Warning: Clicking the Unlock button will discard any unsaved changes the locking user makes.

It is also important to remember that forms submitted via the Admin Portal will generate a new database record that may be viewed within the Admin View function. The User Portal is more collaborative, and a single database entry will be made and updated with each form submission for as long as the User is subscribed to that specific form.

The reason for these two unique form-submission behaviors is to offer a collaborative experience to groups updating a single form with the User Portal and individual assessments by administrators from the Admin Portal form viewer.

Note: There are links on various pages that also bring you to the Edit form. Many of those will take you to the Edit Entry page and a specific field on the Form.

Forward an Entry (Email)

Forwarding or re-sending an entry to one or more email accounts is as easy as clicking the Email Entry Data link on the View Entry page. If sending to multiple email addresses, separate each entry with a comma.

View Status

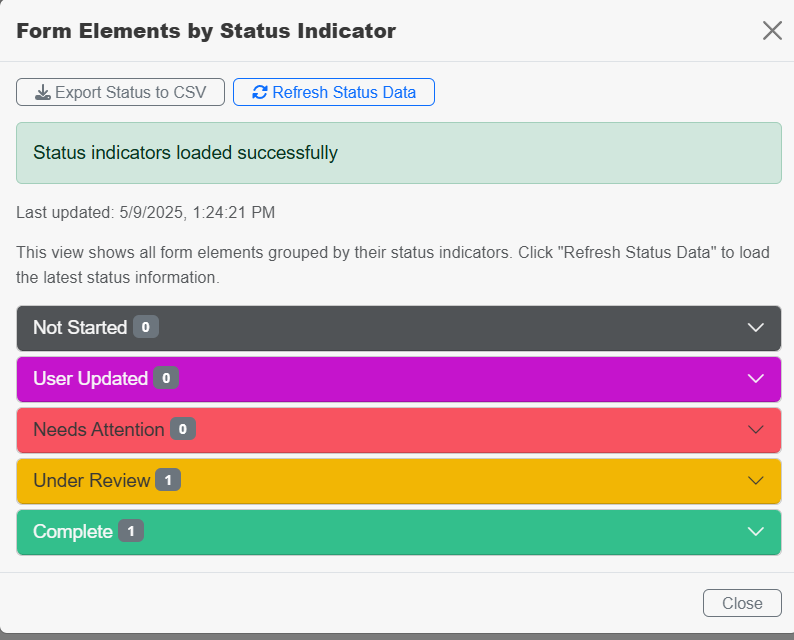
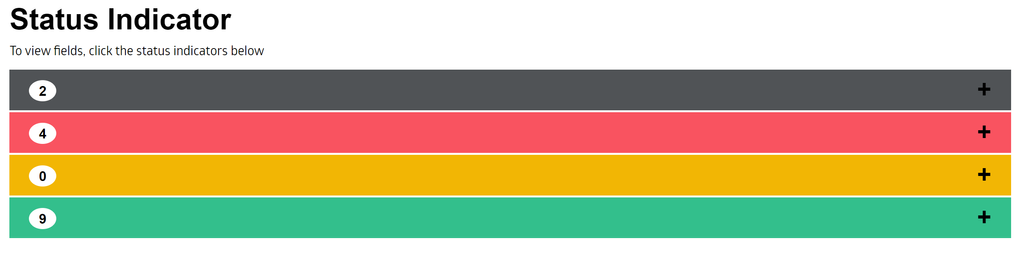
The View Status button in the Entry Manager takes users to the Status Overview page. This page provides an accordion view of the possible statuses and counts the number of controls currently in each status for viewing the Entry.

Clicking on one of the Status Tiers expands the Tier view and allows the Administrative User to view the Controls currently assigned that status. The Go To Field links for each field can be used to navigate directly to the field on the reviewed form.

Status Indicators can be updated anywhere they are visible. See the Form Status Indicators page for more information on how to work with status indicators.

Print Entry

The Print Entry Data button engages your system's built-in print capability to print the Entry.

Generate PDF

The Export to PDF button generates a PDF of the current Entry and initiates a download to your system.

Generate CSV

The Export Status To CSV button generates a Comma Separated Variable (CSV) file containing the data from the current Entry. This file can open the data in a Spreadsheet program or import it into another database.

Generate Document

The Generate Document function uses an associated template to generate a Word or Excel document from the data. To learn more about templates, see the section on the Template Manager.

Delete Entry

Selecting the Delete Entry Data button will delete the current Entry.