Form Logic
One challenge of traditional methods of collecting user data (e.g., via documents or spreadsheets) is the complexity of instructions that tell users which parts of the form(s) apply to them, depending on their situation or data. A classic example is a standard IRS form with many instructions, such as “If you enter data here, skip to step X.” These are necessary because the form cannot interact dynamically with the user’s actual data. The ITAM Logic Builder helps you avoid complicated instructional guidance. Instead of manually telling your users how to navigate your form, you can use the Logic Builder to respond dynamically to user input and customize their interaction with the form based on their needs.
The Logic Builder does more. It can enable custom notifications or data integration points while filling out a form, rather than waiting for submission. It can also create rules around a review and approval process for data.
This guide covers Form Logic and the Logic Builder, an aspect of Advanced Form Management that helps route users through a form efficiently and manage other form-related workflow needs. ITAM supports six (6) different areas for advanced Logic:
- Rules to Show/Hide Fields
- Rules to Skip Pages
- Rules to Send Notification Emails
- Rules to Send Form Data to Another Website
- Rules to Add approvers for a form
- Approve/Deny Notification Logic
Accessing the Form Logic Builder
The Logic button tab, located below a form entry in the Form Manager, lets users access a form’s logic configuration options.
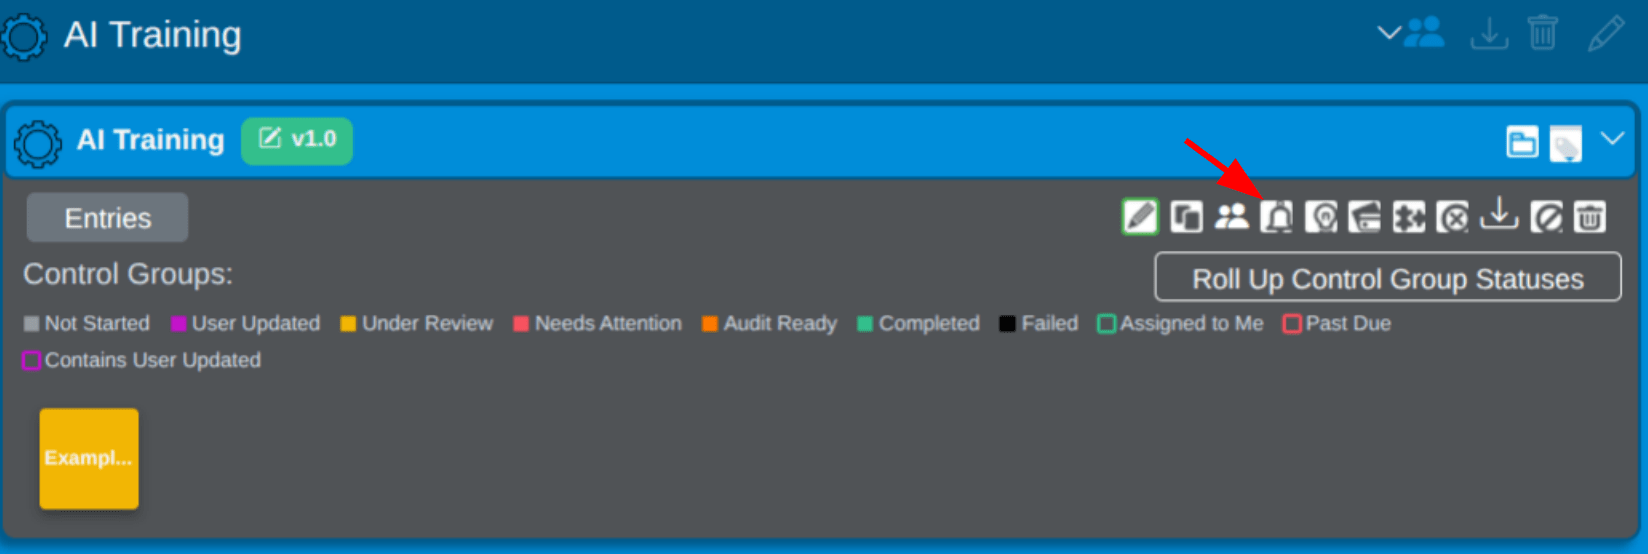
Regardless of the form you work with, the Logic options are the same and apply only to that form, giving you a powerful way to control how information notifications flow.
Note: A key feature of the Logic Builder is its ability to adapt to the selected field type. For example, when you choose a field for comparison, the options adjust to match the field. The various field-specific options are included in a table at the bottom of this page.
Logic Options
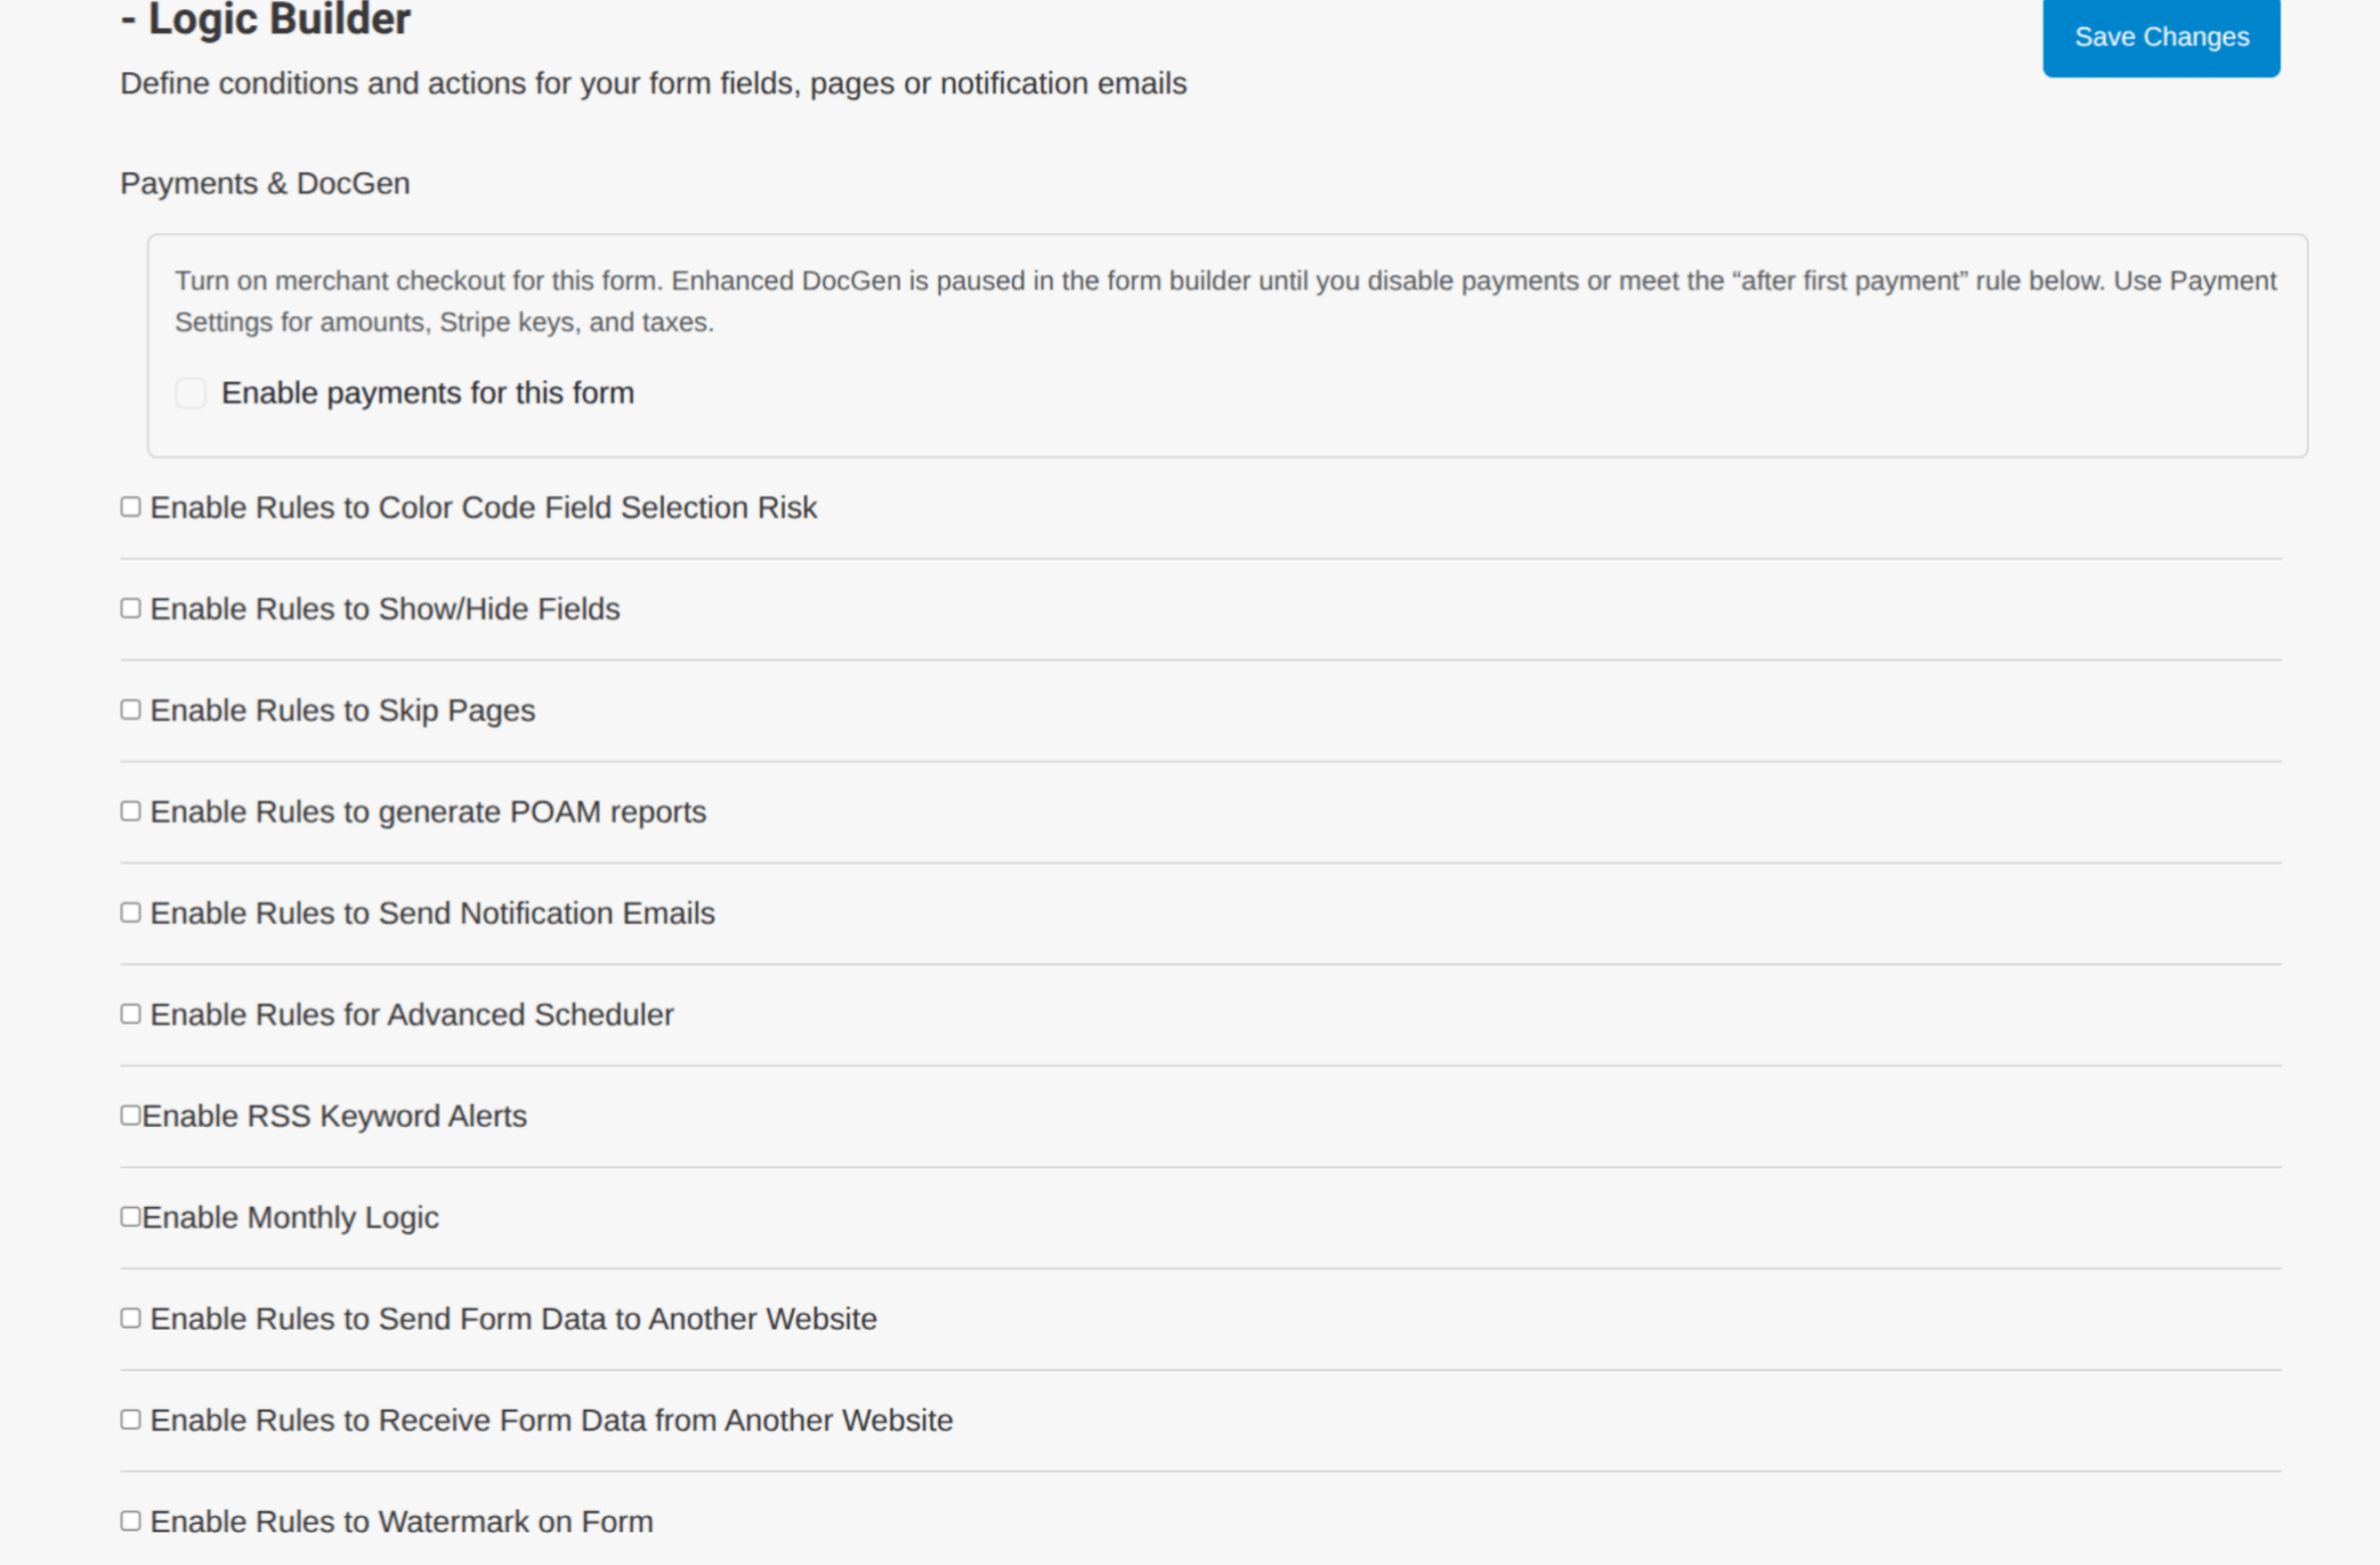
Enable Rules to Show/Hide Fields
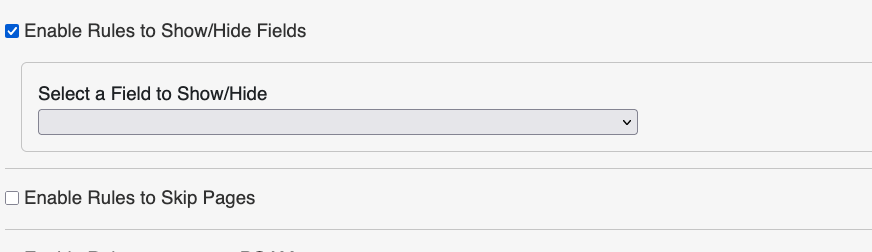
One of the primary ways to simplify a user’s interaction with a form is to display only the fields they need. This minimizes extraneous data and streamlines the user experience.
ITAM can show or hide any field based on one or more conditions the designer chooses. Each time a user makes a selection or enters text in the field, the show/hide conditions are evaluated, and the associated field is shown or hidden immediately. If no conditions are set, a field will always be displayed.
Creating conditions to display or hide a field is as simple as selecting fields from the drop-down menu and defining the desired action and one or more conditions.
Conditions are a set of field comparisons in the form of some value. The types of values available will depend on the field type and the comparison used. See the section on Dynamic Comparison Options at the end of this page for more information.
When selecting a date to trigger logic, you can choose a single date using the Is value, or set a date range by setting both the Is Before and Is After options, as the illustration below shows.
Enable Rules to Skip Pages
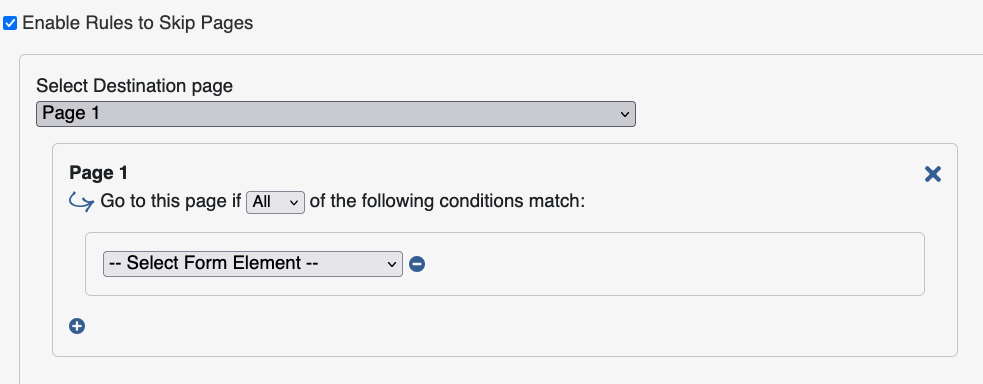
Sometimes, certain users don’t need to fill out entire form sections. ITAM lets you configure a form to direct a user to any page based on their data-entry choices. This lets you control how a user progresses through your form and skip unnecessary pages.
Creating conditions for controlling page skips is similar to show/hide fields, except you first select the page you want a user to navigate to, then set the conditions to send them there.
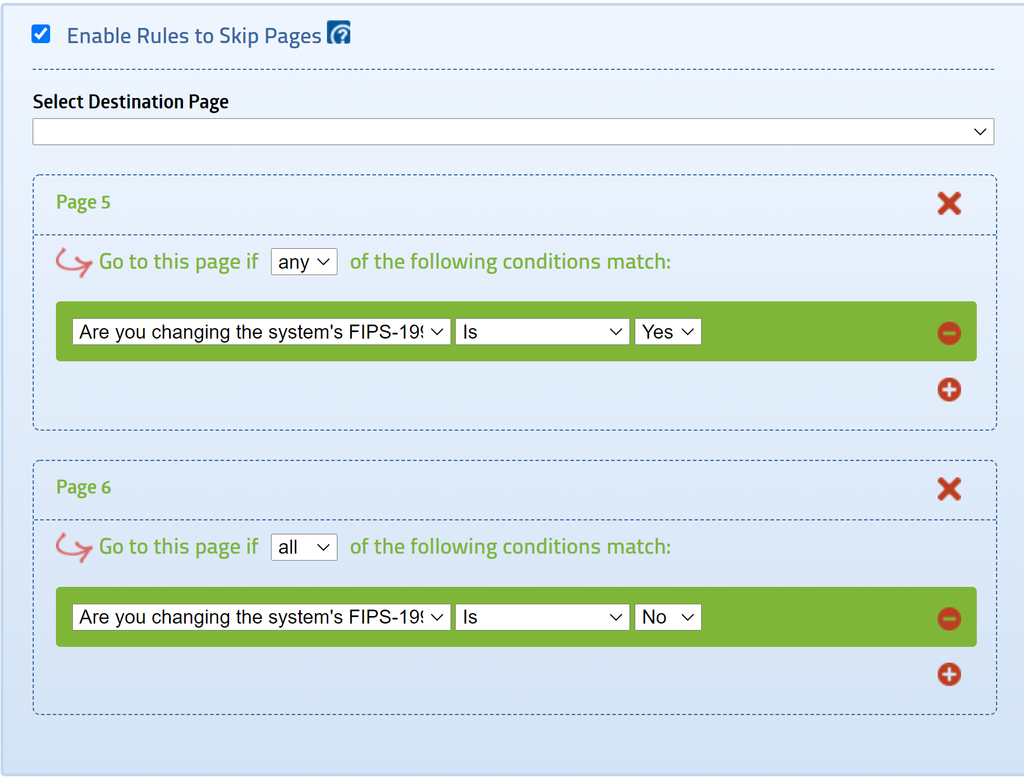
For example, the following illustration shows the logic behind a two-choice dropdown field. When the user selects “Yes” for this field, the page advances to page 5. When the user selects “No,” the page advances to page 6.
Selecting a date to trigger page navigation is similar to showing and hiding a field: you can choose either a single date or a date range, as the next illustration shows.
Enable Rules to Generate POAM Reports
This logic lets you trigger a POM report based on conditions in the form. This is covered in more detail in the POM lesson of the Administrator Bootcamp.
Enable Rules to Send Notification Emails
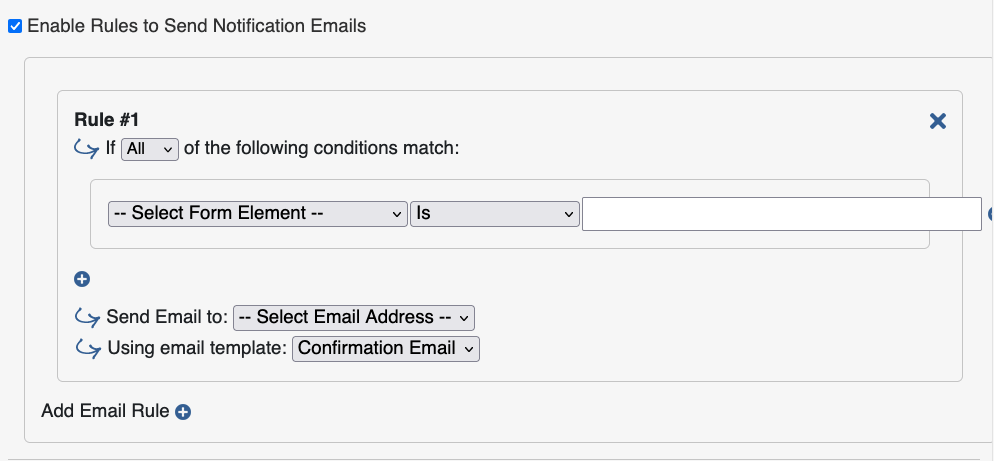
In the Form Notifications section of the guide, we covered how to set up notifications when a form is submitted. ITAM also lets you send messages while filling out a form. You do this by setting rules for sending notification emails. Defining additional logic for sending notifications to specified email accounts is similar to SHOW/HIDE and Skip Pages. In addition to choosing the conditions, you must also set who receives the email and which email template is used.
If you select the Custom email template option, the form will display additional fields to create the email template.
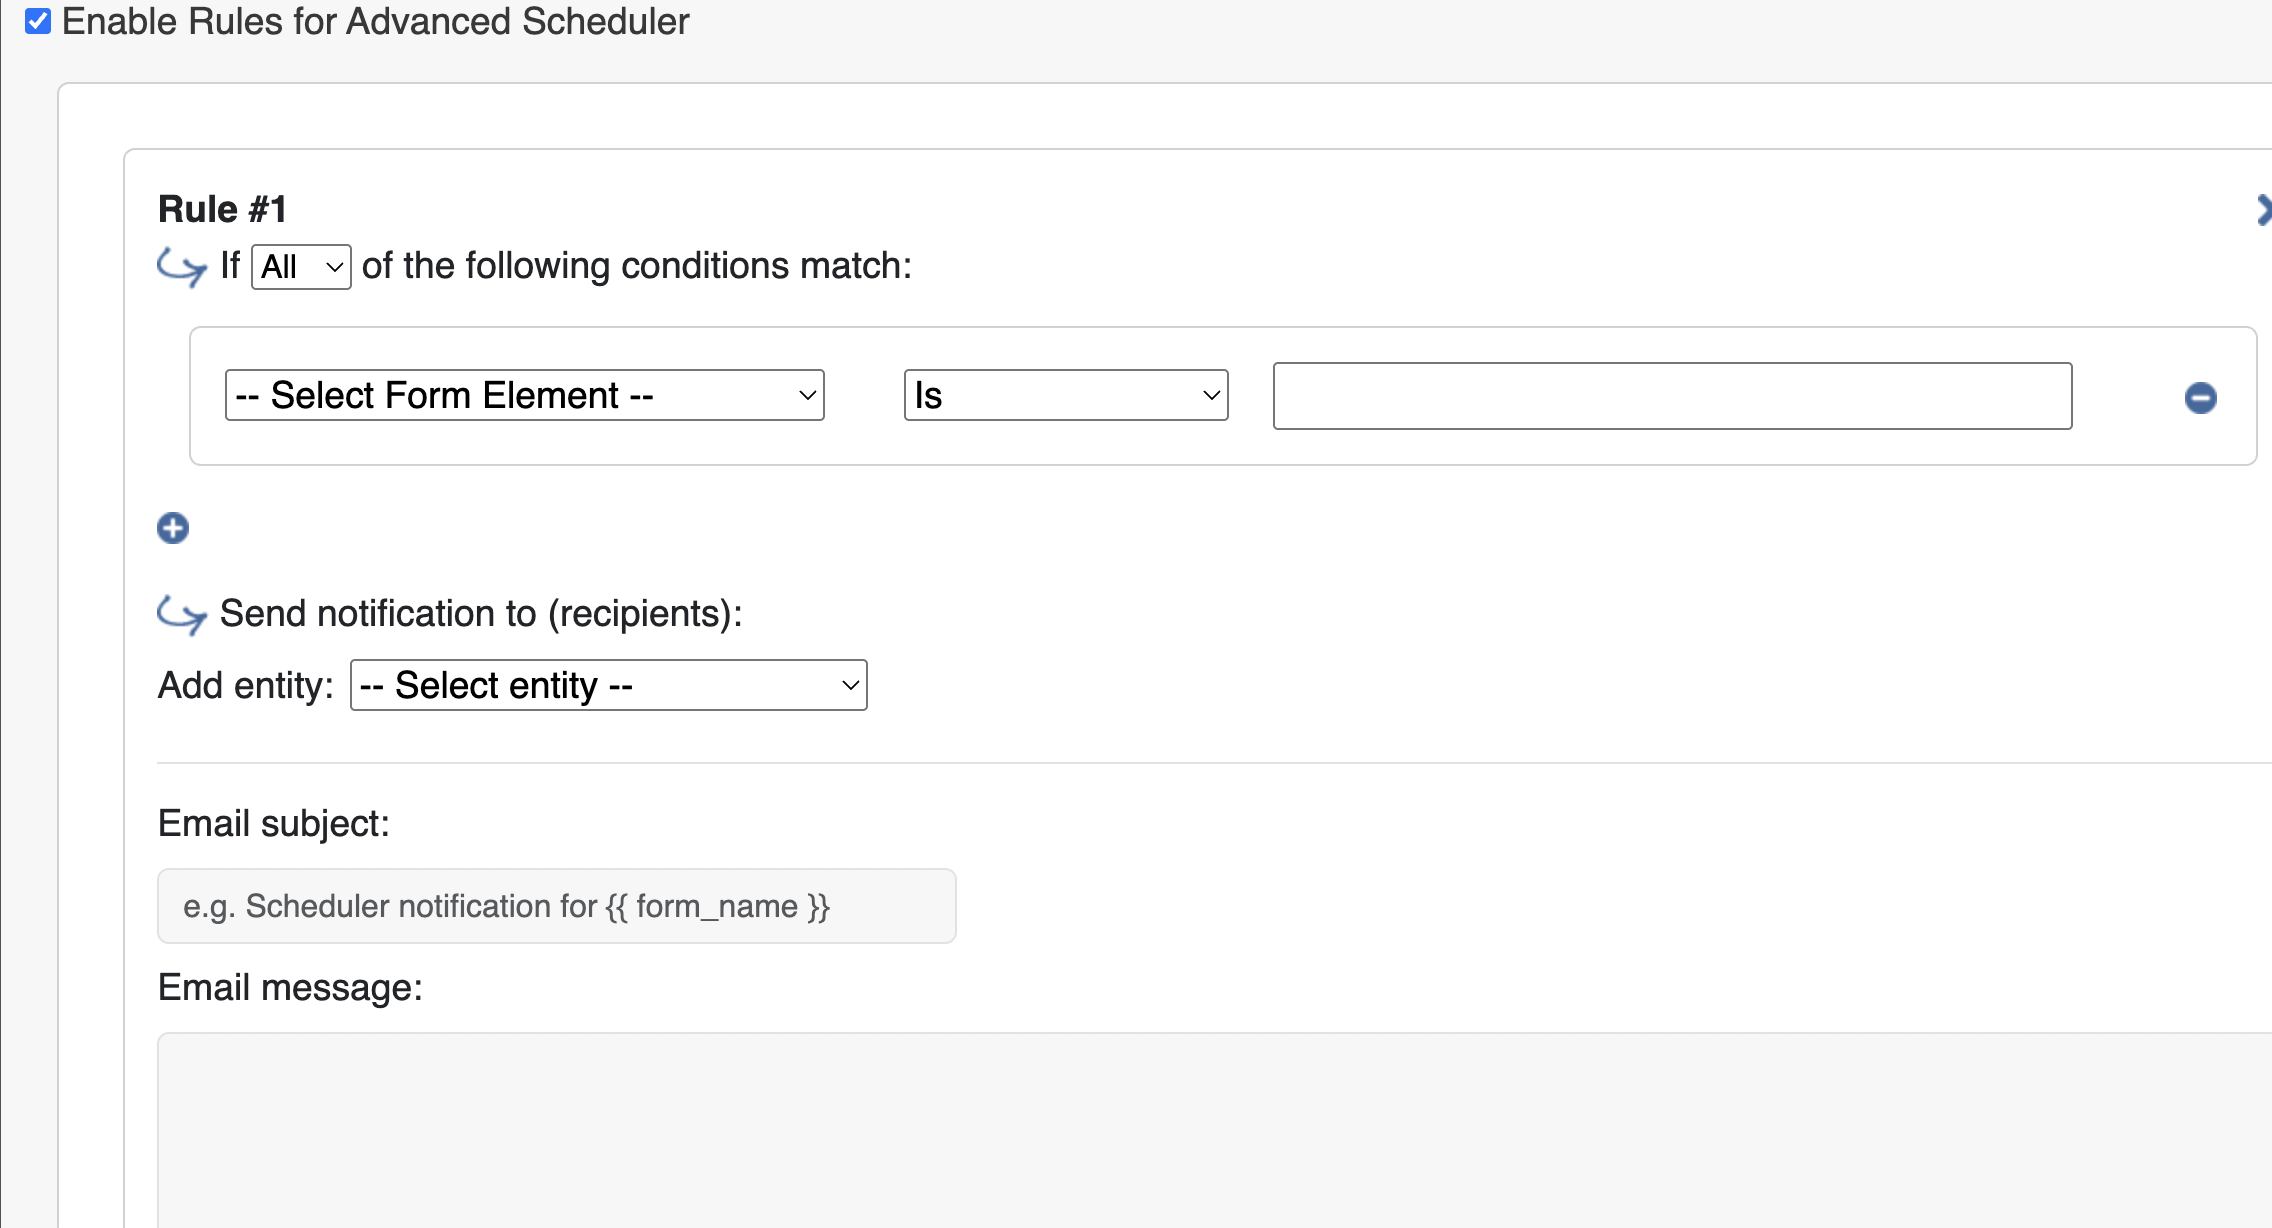
Enable Rules for Advanced Scheduler
The Advanced Scheduler rule is very similar to the interface for sending notification emails. Instead of using pre-built email templates, however, you can create messages that go directly to the Scheduler, which notifies the user about changes to form elements.
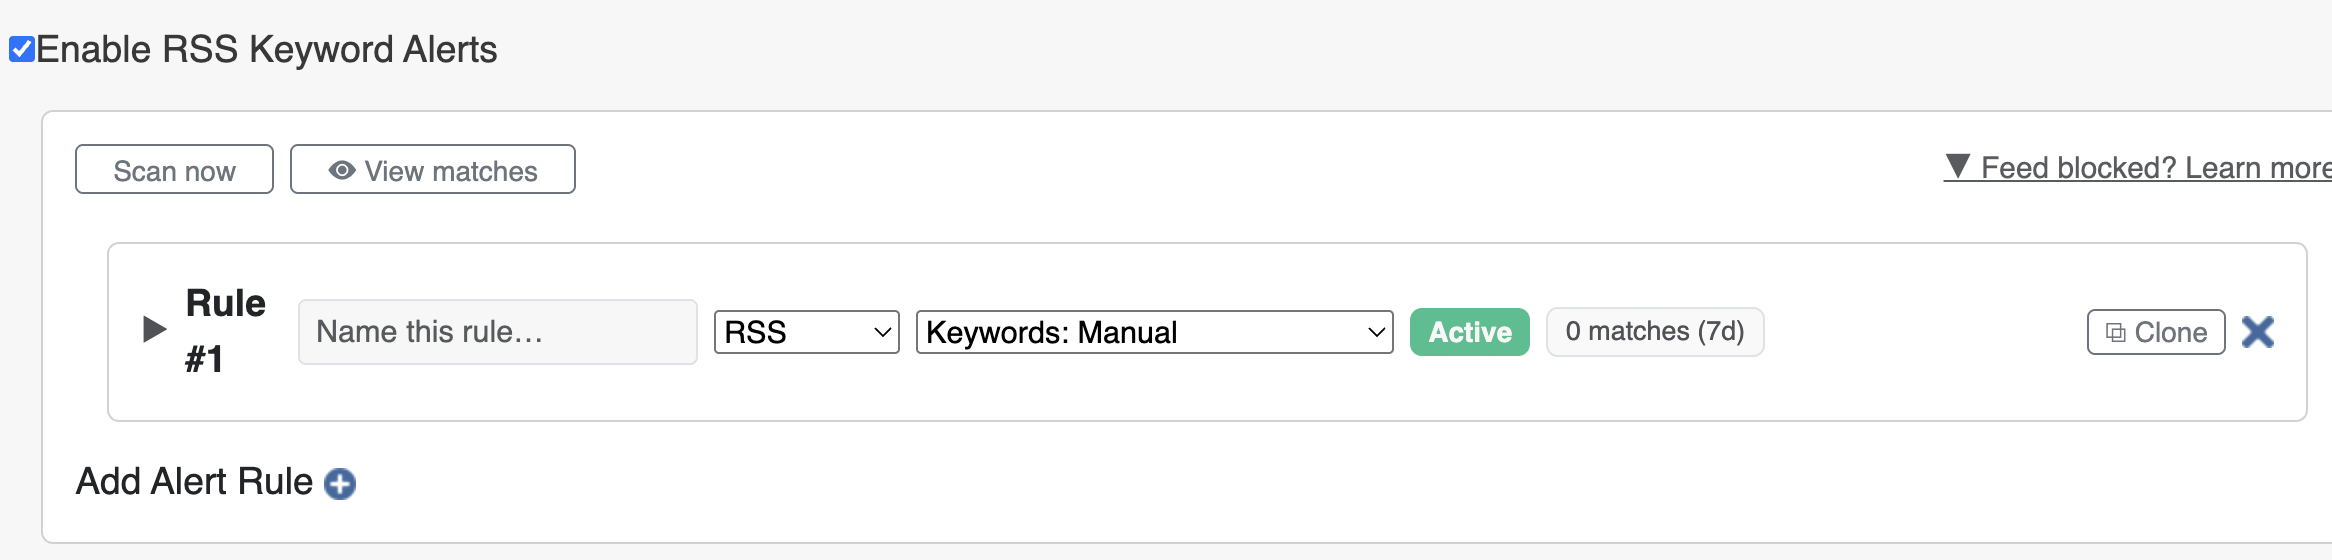
Enable RSS Keyword Alerts
The RSS Keyword Alerts function lets you link alert feeds from sources like CISA KEV and NVD CVE. You can also set up rules based on any alerts related to your form.
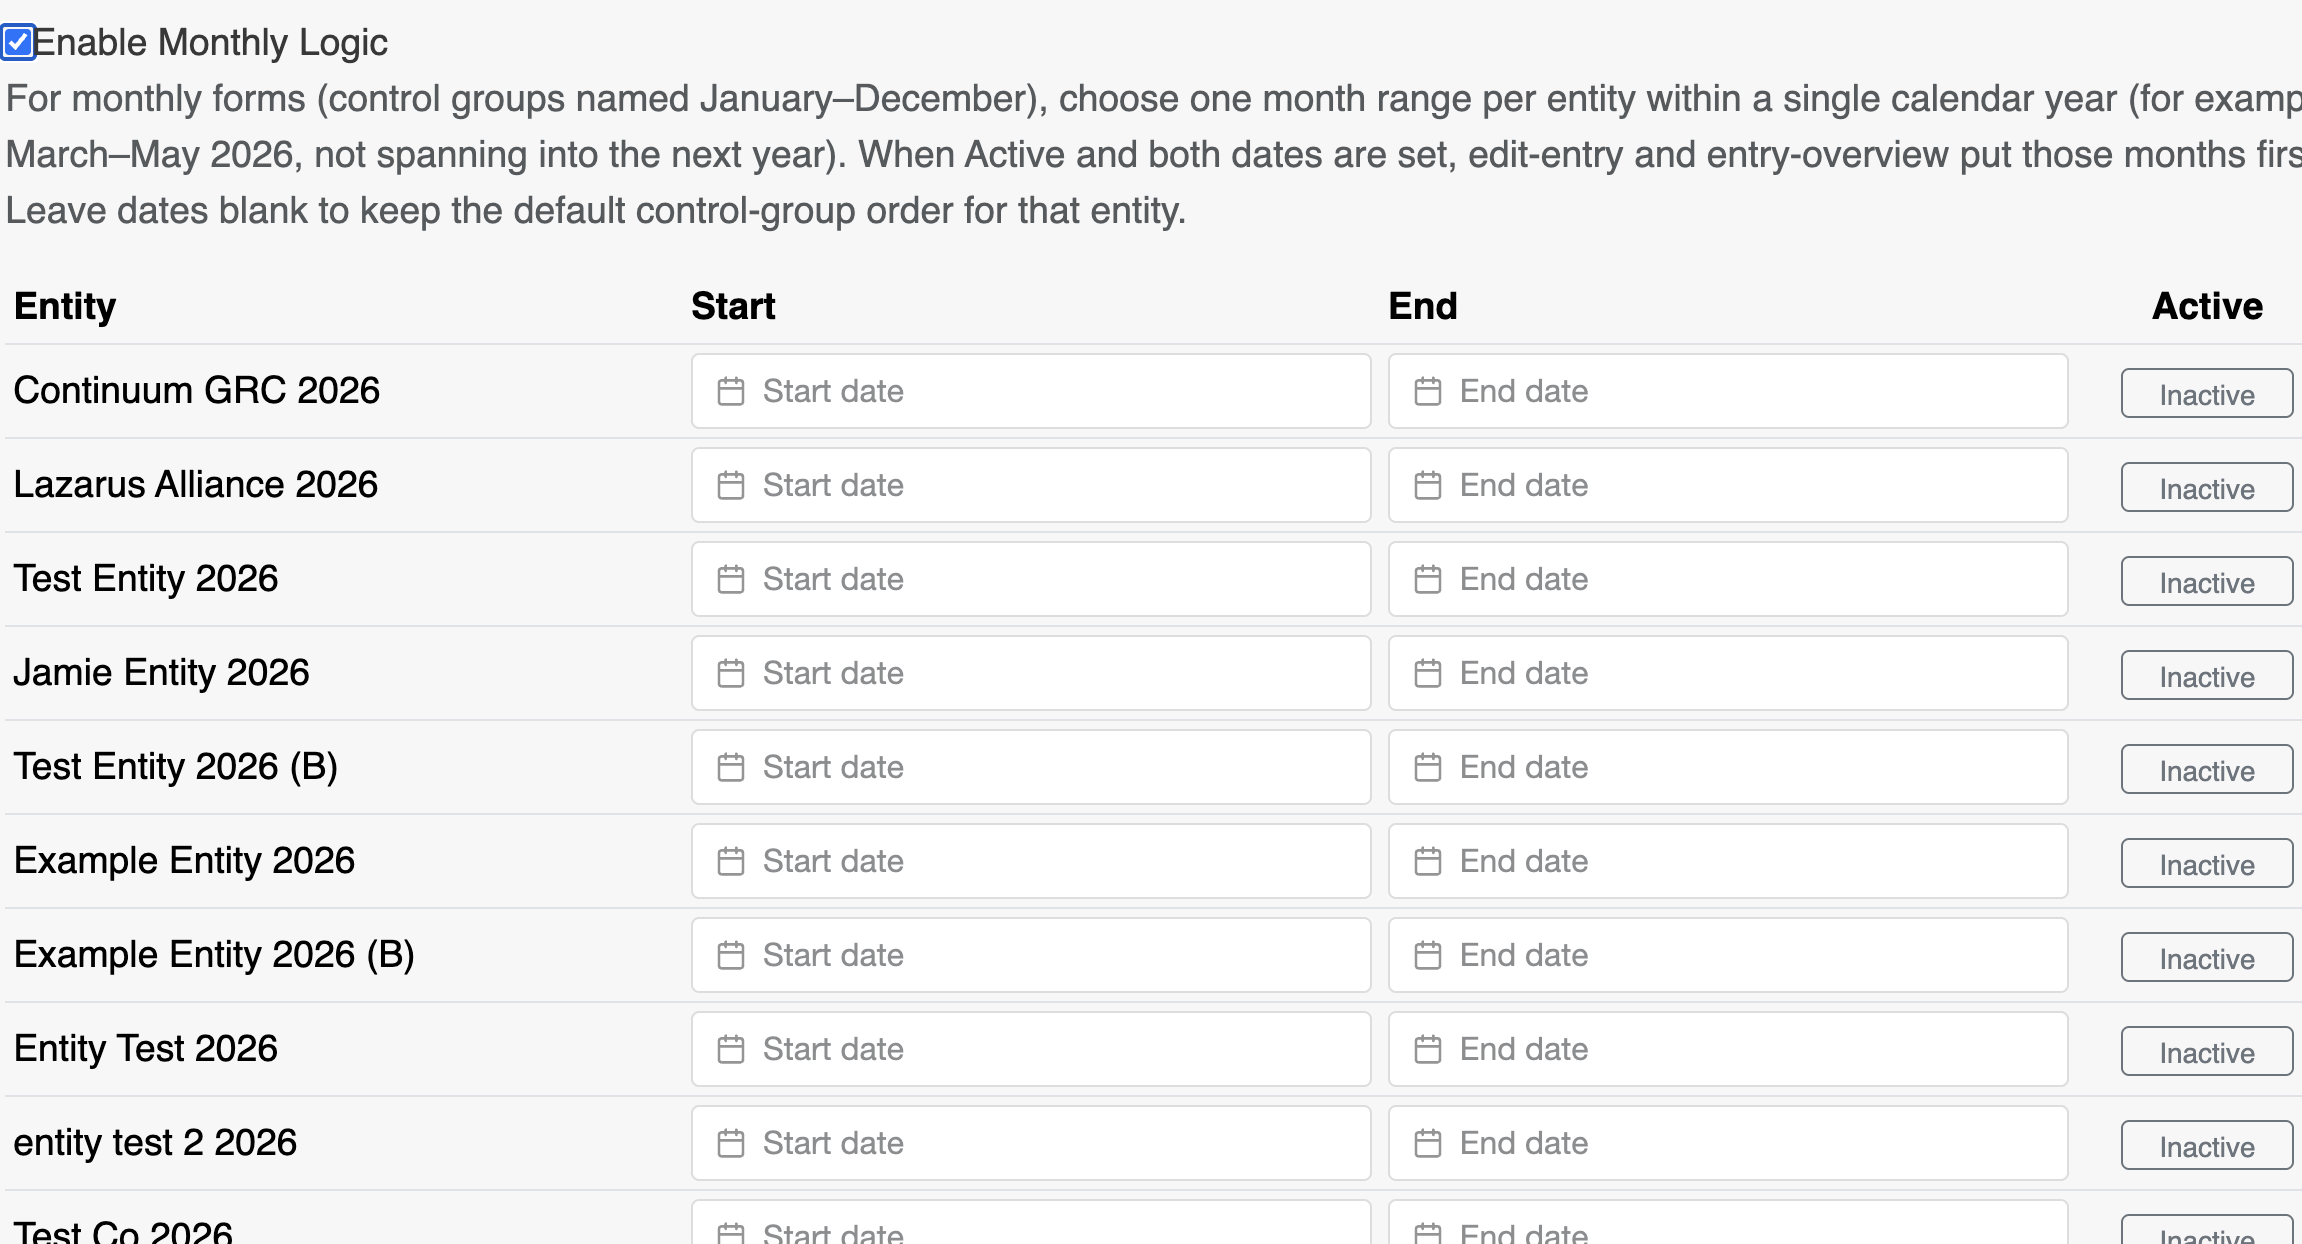
Enable Monthly Logic
For monthly forms (control groups named January–December), choose one month range per entity within a single calendar year (for example, March–May 2026, not spanning into the next year). When Active and both dates are set, edit-entry and entry-overview put those months first. Leave dates blank to keep the default control-group order for that entity.
Enable Rules to Send Form Data to Another Website
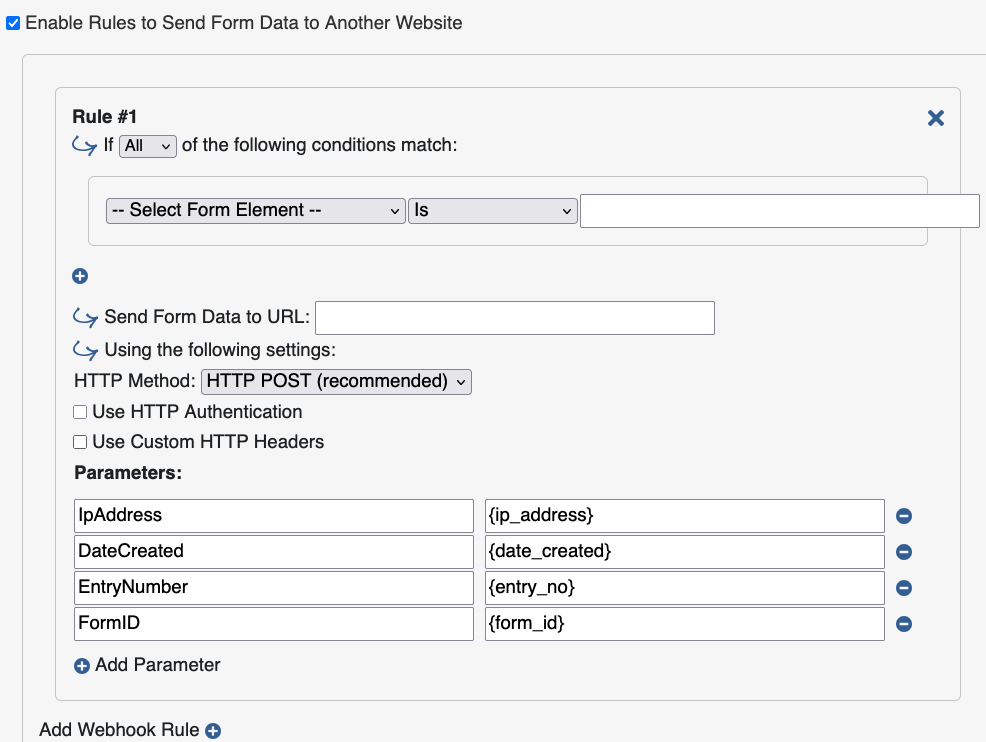
In the Form Notifications section of the guide, we covered how to send data to another web page when a form is submitted. ITAM also lets you send data to another web page based on rules around the data being entered. The top of the configuration section lets you define one or more rules that trigger sending the data, and the bottom of the form lets you configure how the connection to the other website is made and what data will be sent. See the Send Form Data to Another Website section of the Form Notifications page for more information on the options for configuring the ability to send form data.
Enable Rules to Receive Data from Another Website
If you are ingesting form data from an external URL, you can set the conditions for that retrieval, including the method, required authentication, required headers, and supported data formats.
Enable Rules to Watermark Forms

This rule lets you specify that form exports and prints include a watermark, and provide the text for it.
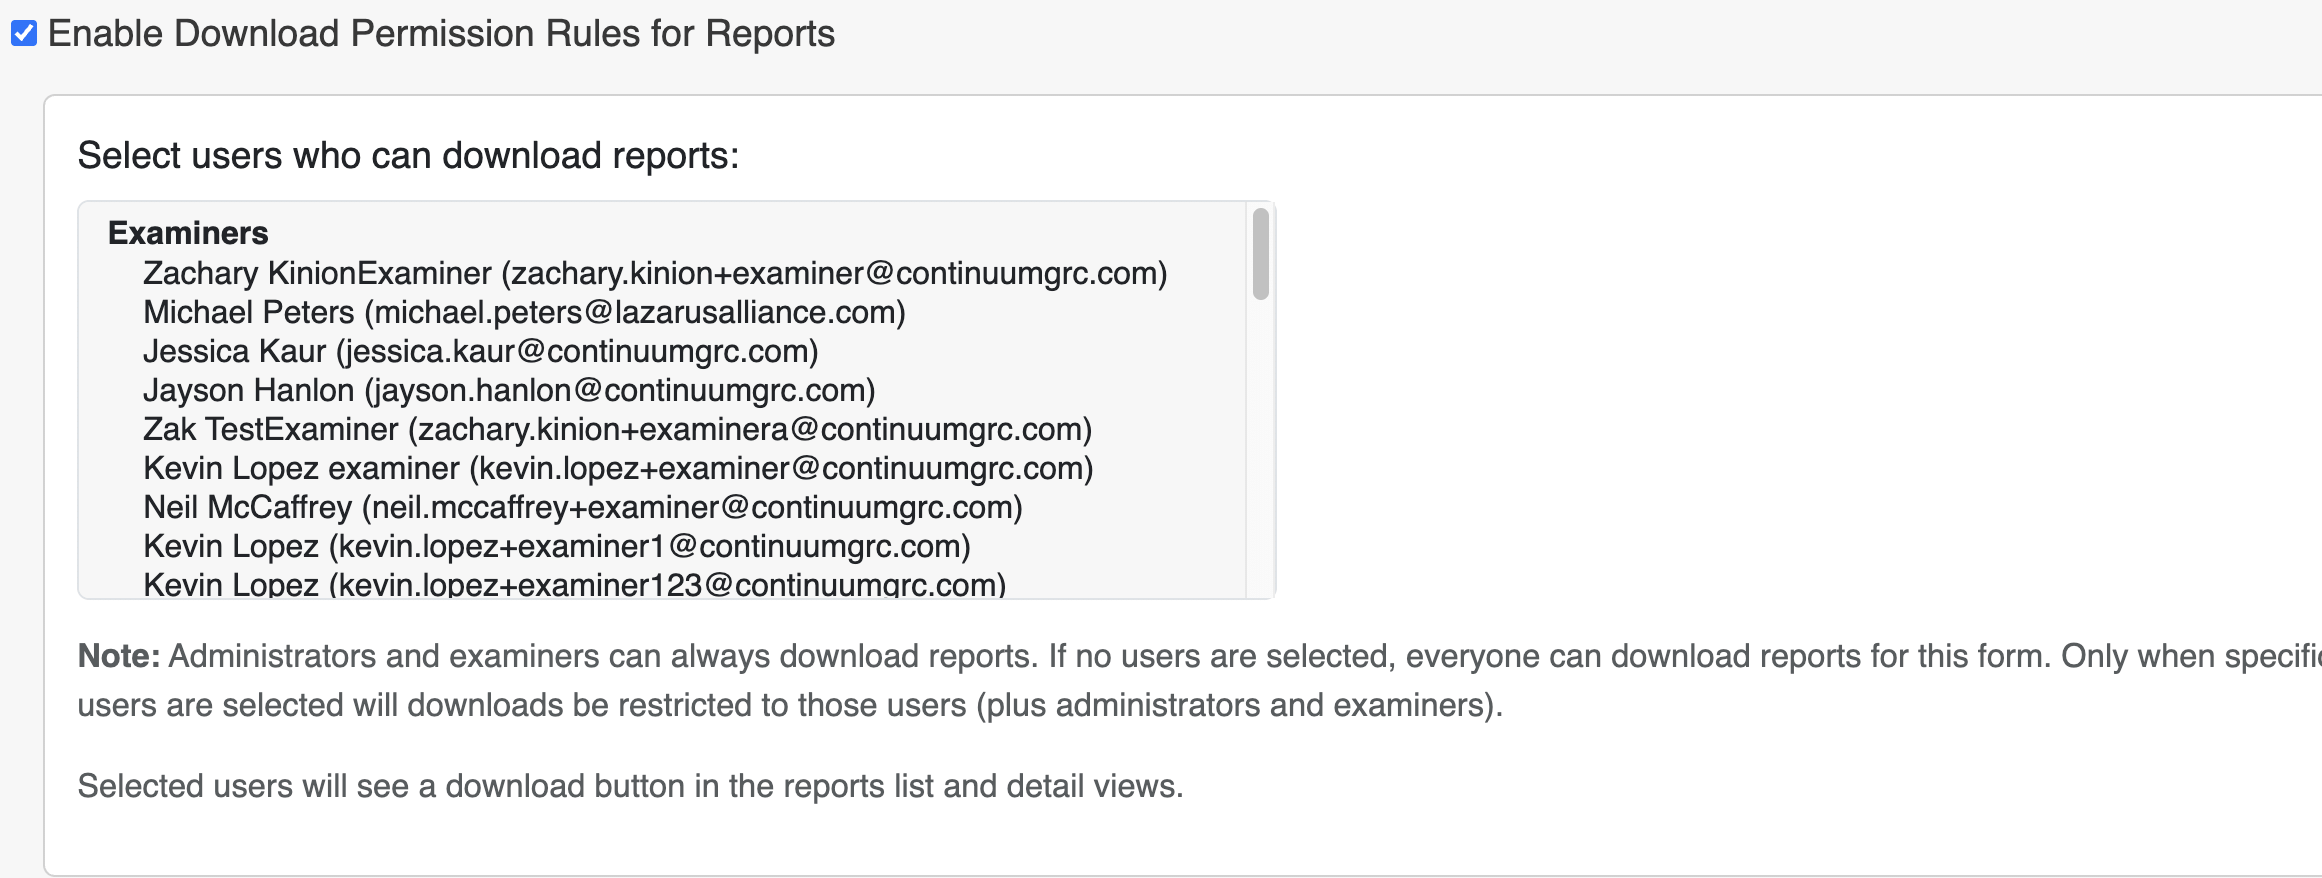
Enable Download Permission Rules for Reports
Here you can select a list of portal users and give them access to download reports from this entity. Note that admins and examiners can always download reports from forms regardless of permissions.
When you are done setting rules, click Save Changes to commit them.
Enable Rules to Add Approvers for a Form
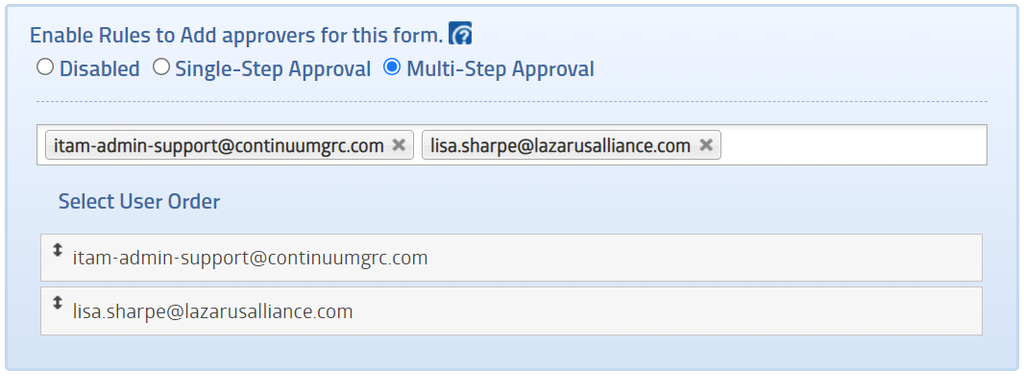
Some forms require approval upon submission. Rules for adding approvers to a form let you configure how a form will be approved.
| Single-Step Approval | Single-step approval involves one or more approvers in a single round. ITAM allows for three (3) options for Single-Step approval. If any user can approve, any administrative user can approve the form. Conversely, if only selected users can approve/deny the form, only those users can approve. Finally, if unanimous approval from ALL approvers is required, all users must approve the form. |
| Multi-Step Approval | Multi-step approval sets up a series of approval gates that a form must pass through to be fully approved. The tool lets you rearrange the order as needed. ITAM will request approval from each user. If any user denies approval, the form will be rejected and will not proceed to the next step in the approval chain. |

Approve/Deny Notification Logic
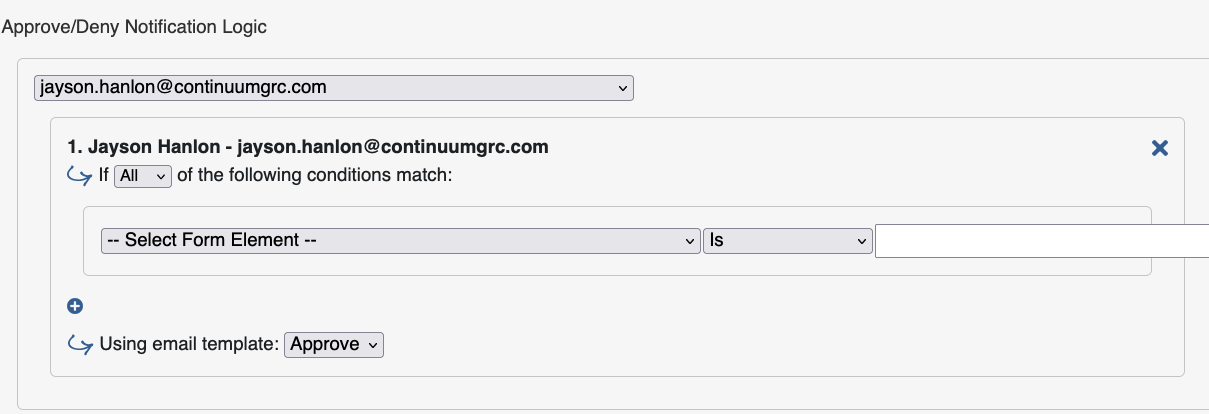
You can set automatic logic to approve or deny a form, eliminating one or more manual approval steps. ITAM does this using the Approve/Deny Notification Logic section.
You can use the Approve/Deny Notification Logic with the Add approvers for this form section. If users have been selected in the Add approvers for this form, the Approve/Deny Notification Logic dropdown will be restricted to those users. If no users have been selected in that section, all users will be available there.
To set a rule for approval or denial, select the approver with whom this logic will be associated. Think of this as the rule(s) the user uses to approve or deny the form. Once a user is selected, a configuration section will be displayed, allowing the rule(s) to be configured.
At the bottom of the configuration section, you can set whether this generates an approval or denial notification.
Dynamic Comparison Options
Multiple logic sections use a selection of comparison operators to gauge whether or not logic should be activated. The comparison options change depending on the field type being compared. Below are the options for the various field types:
Text
| Is | An exact match to the value entered |
| Is Not | Does not precisely match the value entered |
| Begins With | The field starts with the value entered |
| Ends With | The field ends with the value entered |
| Contains | The field contains the value entered somewhere within it |
| Does Not Contain | The field does not contain the value entered somewhere within it |
Numbers
| Is | An exact match to the value of the number entered |
| Less Than | Is less than the value of the number entered |
| Greater Than | Is greater than the value of the number entered |
Selection
| Is | Allows for a comparison to the possible values presented in the Selection field |
| Is Not | Does not match one of the possible values presented in the Selection field |
| Begins With | The selected option begins with the value entered |
| Ends With | The selected option ends with the value entered |
| Contains | The selected option contains the value entered somewhere within it |
| Does Not Contain | The selected option does not contain the entered value anywhere within it. |
Checkboxes
| Is Checked | The checkbox is checked |
| Is Empty | The checkbox is not checked. |
Ready to build your Roadmap to Risk Reduction?
Call 1-888-896-6207
Call 1-888-896-6207
Start Your Free 14-Day Trial
FedRAMP Certified GRC Platform Featuring the World's First AI Auditor